


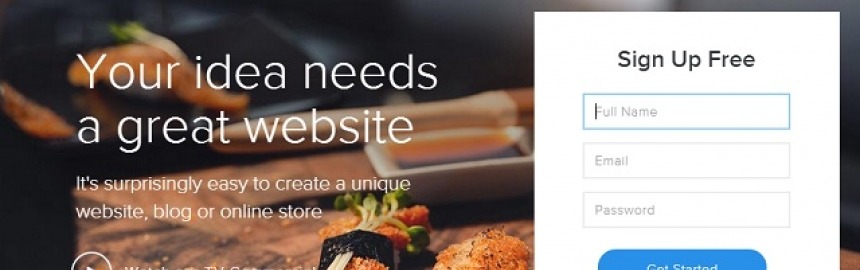
Regardless of whether you have a blog or an eCommerce store, having a beautiful website will lead to an increase in conversions, because people trust profess
SME Pals is reader-supported. When you buy through links on our site, we may earn an affiliate commission. Learn more.
How to Start an Online Boutique with Shopify
See how Shopify makes it quick and easy to design, build and host your own cutting-edge, responsive online store/boutique.
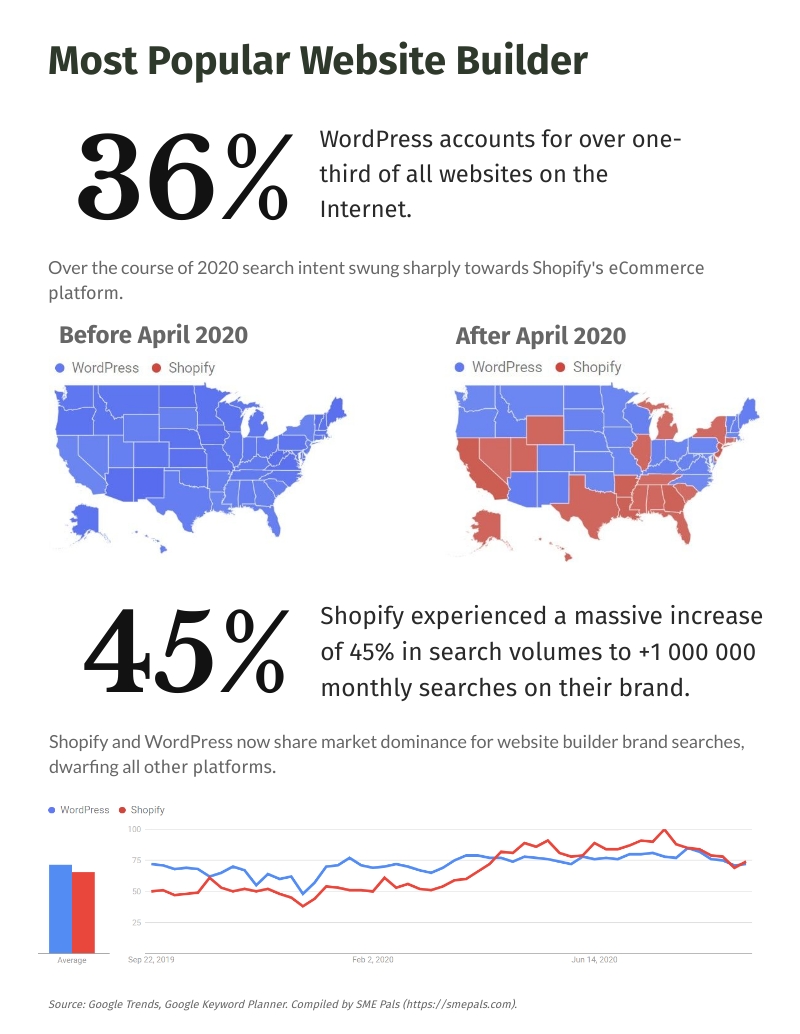
Shopify overtook WordPress as the most searched website builder platform in 2020.
Shopify overtook WordPress as the most searched website builder in 2020, with over 1 000 000 brand searches per month.
Shopify powers over one million businesses worldwide.
Shopify Pricing
Shopify offers a 14 day free trial and a range of cost-effective paid plans based on your requirements.
-
Basic Shopify
All the basics for starting a new online boutique
$29/month
- Unlimited Products
- Up to 64% Shipping Discount
-
Shopify
Everything you need for a growing business
$79/month
- Unlimited Products
- Up to 72% Shipping Discount
-
Advanced Shopify
Advanced features for scaling your business
$299/month
- Unlimited Products
- Up to 74% Shipping Discount
-
ShopifyPlus+
Enterprise-grade solutions for high volume merchants
Custom
Save up to 10% when you pay annually or 20% discount when you pay biennially.
It's important for an online venture to become operational as quickly and cheaply as possible. To this end, Shopify undoubtedly represents the best solution for small to medium sized startups.
Follow along with this step-by-step guide to setting up a Shopify eCommerce site, and you'll be selling online in no time at all.
1. Start a Free Shopify Trial
First thing's first. Create your free trial account (Hint: Click the screenshot below).
Shopify Quick Start
Shopify stores around the world have generated over $135 billion in sales
![Start an online store for free with Shopify]()
-
Start a Shopify store to get setup fast and win your first sale. Then, scale quickly.
To get started, you need the following info (no credit card required) - a store name, email address and password.
That's it! Quick & easy.
Once you've added your details, hit the "Create your store now" button and Shopify will build the new site and respond with a success message, like this:

2. Configure Store Settings
Click "Take me to my store" and complete the form presented to reflect your particular details:

In particular you will be able to specify what type of products you want to sell. Don't worry if you aren't 100% sure about anything as it is easy to make changes later on.
3. Get Ready to Launch
At this point, your store is essentially ready to go. Not bad for about a minute's worth of work, right?
You should now be able to see the store's dashboard that, by default, shows a startup tutorial:

It clearly denotes the 3 remaining steps required to launch the site:
- Customize the theme
- Add products
- Choose a domain
You can follow along with each step to get the store just how you want it.
4. Customizing the Theme
I recommend that you browse through the theme store (hint: click 'Themes' from the left hand admin menu, and then 'Visit the Theme Store' button at the top right of the page) as there are a wide range of free and paid themes that will give your store a slick, professional look and feel:

A word of advice: Don't waste too much time on the theme. Find something that is lightweight and clean to begin with and then focus on adding products and marketing.
The quicker you can start selling and generating revenue, the easier it will be to spend time and resources tweaking the site's template later on.
5. Add Products
It's super easy to start adding products to the store. Either click on the link to add products in the startup guide, or click on the Products link in the left hand admin menu, and click Add a product:

From here you can add info such as:
- Title
- Description
- Price
- SKU
- Barcode
- Tax
- Shipping
- Weight
- Options
- Images
- Tags
- SEO
Remember that if you intend to attract valuable search engine traffic it is absolutely vital to provide unique and helpful product content.
Provide informative product descriptions. Genuine reviews. Original photos. Helpful advice and tips. Anything that a potential buyer would find compelling and useful.
Without great content, even a powerful platform like Shopify won't be able to make your products rank well in Google.
6. View & Refine the Store
At any time you can click on the View your store button at the top right of the admin dashboard page to check out the store.
Chances are you'll want to do some tweaking and add a few standard pages like About us, Terms & conditions, and so on.
You can access everything you need from the left hand admin menu, and it's a good idea to familiarize yourself with the following options:
Bear in mind that some options may not be available, depending on which hosting plan you select.
All in all Shopify represents arguably the best value for money for the highest quality hosted shopping cart solution. Check out Shopify, Volusion & Bigcommerce for more on how it compares to other leading solutions.

Any eCommerce store owner looking to increase sales by driving Website traffic from organic search needs to pay close attention to what structured data (rich snippets) is all about.
From a technical point of view, structured data is implemented by using additional markup in your HTML code that uses an agreed upon vocabulary for representing data in webpages (defined at schema.org).
Here's a quick step-by-step, beginner's guide to making a free website (start for free, or choose from their low-cost paid plans) using Weebly - one

One of the key factors in the success of any eCommerce site is great marketing - and email is one of the most effective of all Internet marketing strategies.

At some point, you're going to need to decide which of the most popular website builders (Wix or Weebly) to use for your own small business website.

Wix is one of the world's best online website builders with over 150 million sites created, and you can get setup for free in minutes by foll

Having a basic knowledge of HTML (HyperText Markup Language) can be a huge help for bloggers, online entrepreneurs, or anyone who might be asked to

Mobile first, responsive Web design is something that can't be ignored because devices likes tablets and smartphones are quickly becoming the dominant browsi

User eXperience (UX) plays a vital role in how well your site converts traffic, and we've got some interesting Web design tips that will give your v

Good Web design is important for success online, but big companies implement bad design all the time.

Website builders have forever changed the world of Web design by allowing us to use free, responsive themes and templates to manage the look and feel of our

We've researched and compared each of the three leading eCommerce website builders to highlight which ones are the most popular, offer the best value for mon

